Roof Kit Installation Best Practice – How to guide for an asphalt shingle roof system
Understanding the correct roof installation technique for an asphalt shingle roof system is essential to the success and longevity of the roof. Following best practice’s for the roof installation is also required to validate roof materials manufacturers warranties. The following guide is provided as a reference only, refer to individual manufacturers guidelines for full details. Follow the procedures outlined below for a worry-free roof and of course, feel free to call our shingle roof experts for roof installation advice.
You space the rafters at 600mm centres, and it is essential to try to get as close to this as possible to avoid having to cut the sheets of plywood.
15mm A-Bond plywood is used for rafters at 900mm centres. The thicker plywood material provides additional strength to span further – as per Australian Plywood Standards.
Before we can install our plywood base, we need to complete a few simple things. We have to check that the entire roof is level. Levelling the roof framing is achieved by either using a straight edge or string lines. A tolerance of 5mm every 4000mm is acceptable. Unlike a tile roof or corrugated metal, the flat appearance of the roof shingles will show any movement in the rafters.
We then noggin timber down the middle of the valley. These timber noggins support the plywood which prevents the underlay and roof shingles from moving, causing it to tear and rip.
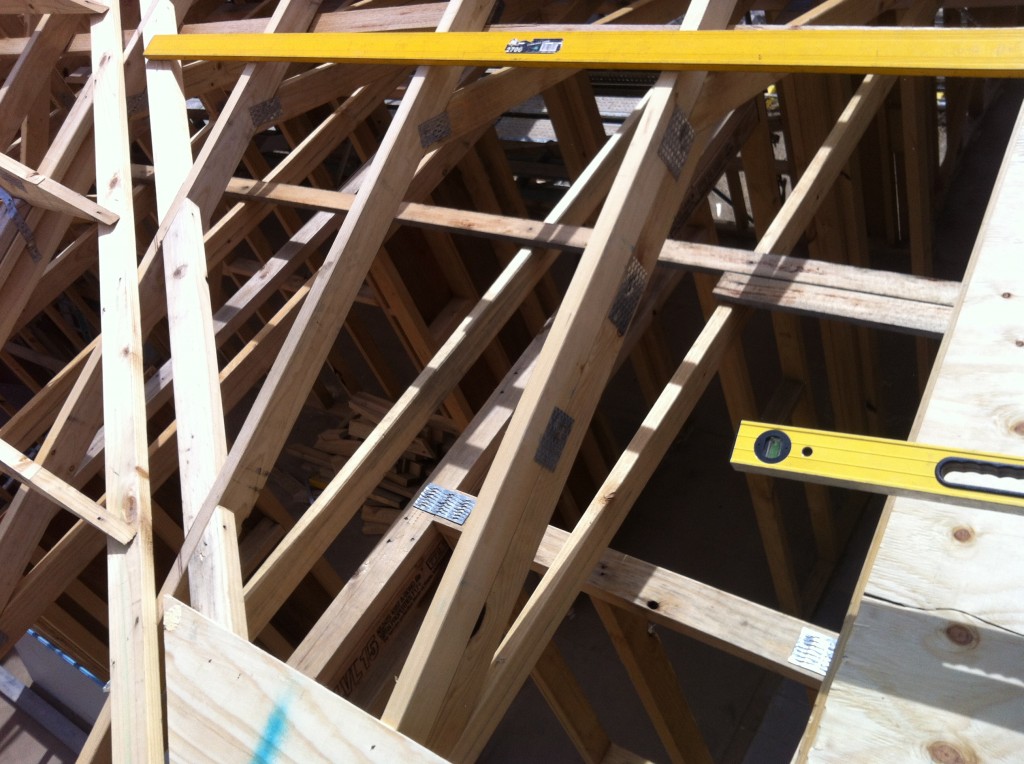
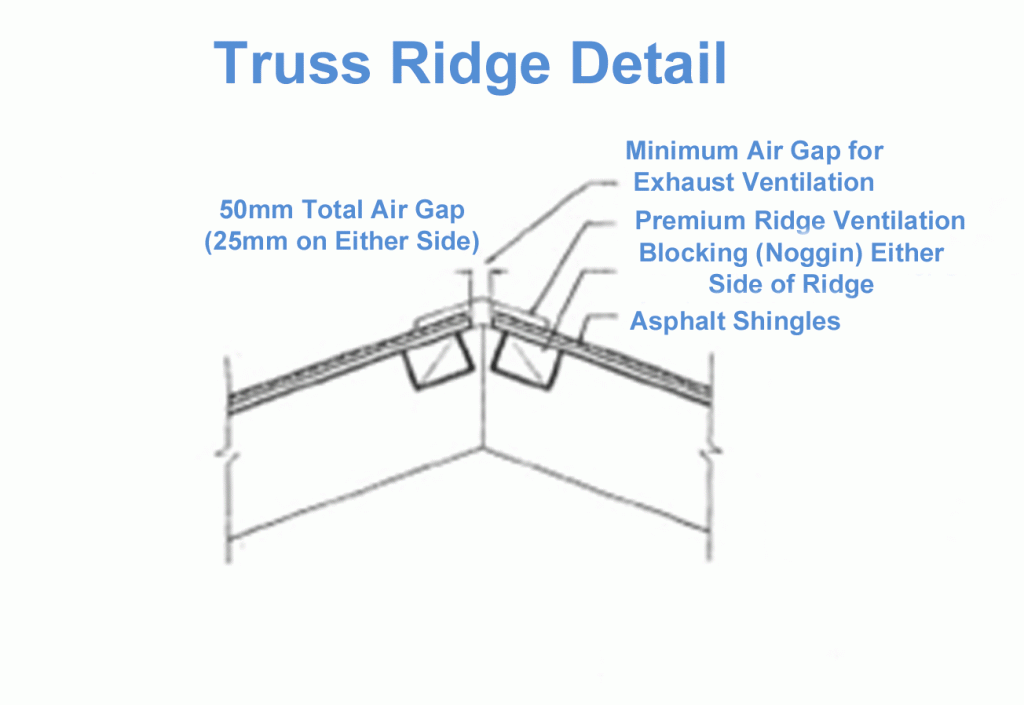
We install timber noggins at the ridge 100mm back from the centre on both sides. These timber noggins provide support for the ply, shingles, ridge ventilation and capping shingles (see below).
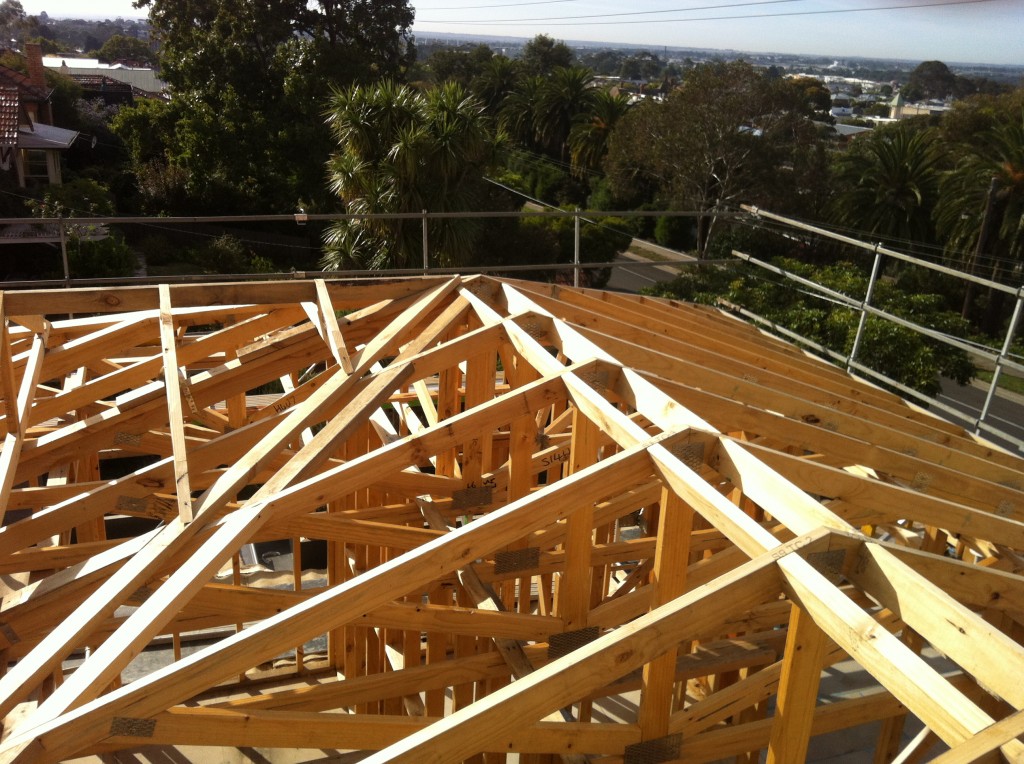
Ventilation of an asphalt shingle roof system is essential. We need to provide equal amounts of inlet ventilation and outlet ventilation. We achieve the inlet ventilation at the lowest point of the roof, just above the fascia. We create a 10mm air gap around the entire perimeter of the roof. The fascia will generally be lower than with other types of roofs materials, and the gutter height needs to be adjusted accordingly. The outer edge of the gutter needs to be lower than the top of the fascia to avoid water entering the home (see below).
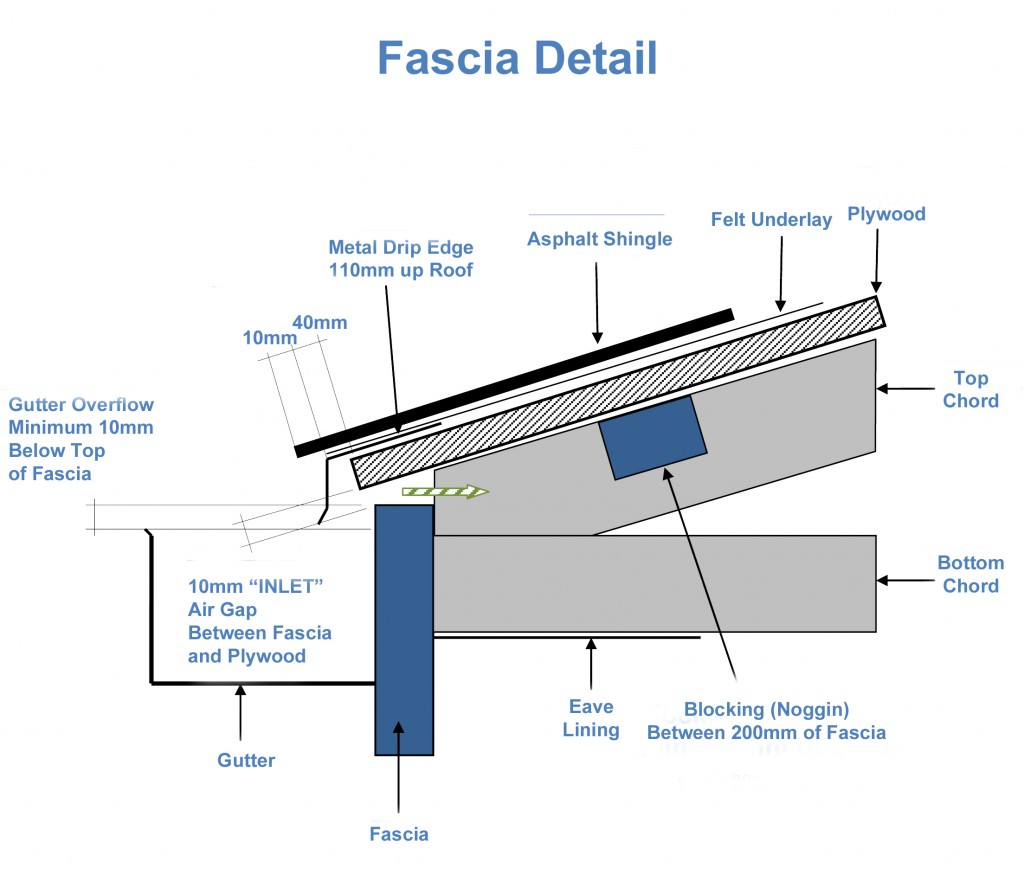
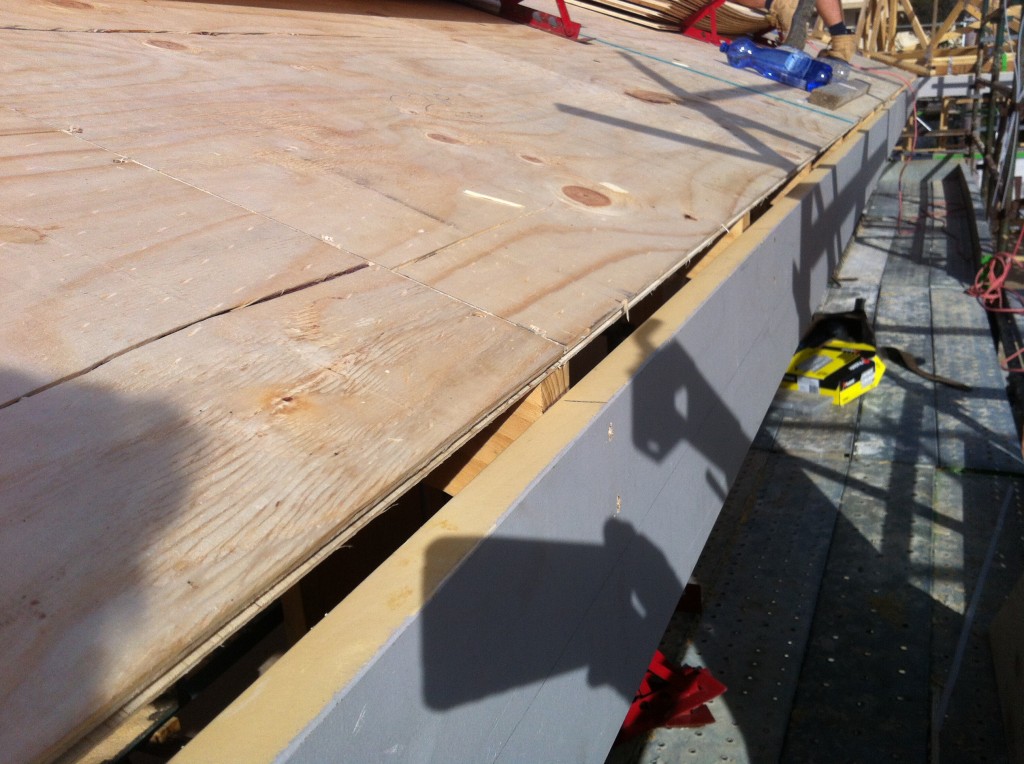
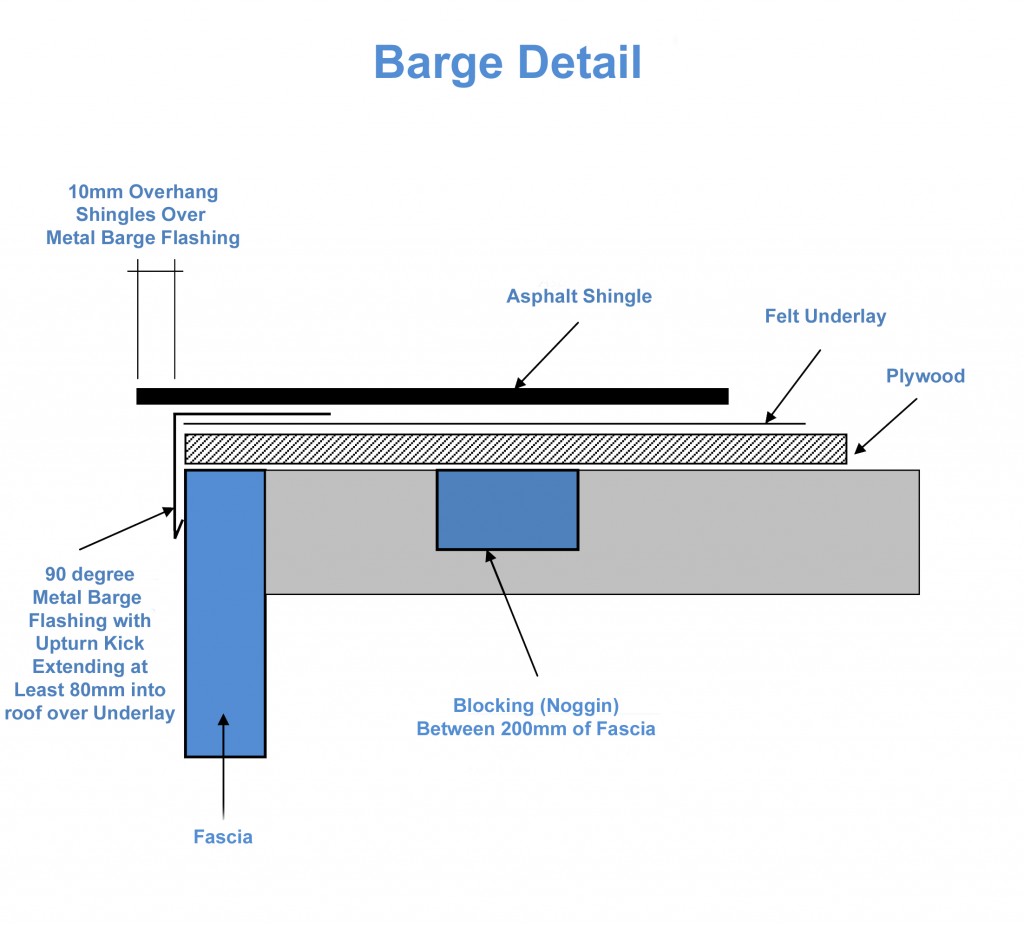
These photos show the detail of the fascia and barges.
The asphalt roof shingle system is now ready to be installed. We use PAA branded “Australian made” A-bond plywood. The plywood has to conform to several specifications to earn this specification. A manufacturers warranty also backs the plywood performance. There is a stamp printed on the plywood with the following details:-
Manufacturers Brand or Name, The word ‘Structural’, face grade, back grade and bond, (e.g. CD-A Bond), Stress Grade, (e.g. F11 or F14), the Australian /New Zealand Standard AS/NZS2269 and the PAA/JAS-ANZ product certification brand stamp.
Look for this certification brand stamp to give yourself piece of mind. Imported plywood will generally arrive with a different moisture percentage. When this changes to local conditions the ply can de laminate, shrink and even twist and warp. We had to replace an entire roof years ago and you only want to do this once.
We fix the plywood with 70mm long framing nails every 150mm into the rafters. We use a staggered nailing pattern between the vertical joints in the plywood, as a “high wind zone” application. We use tongue and groove A-Bond Structural Plywood to provide the strength for the other roof materials. The vertical join or short edge requires a 2mm gap between the sheets. A 2mm gap allows for any expansion in the timber. The tongue and groove “long side” should but together tight as there is a gap machined into the ply during manufacture.
Clips do not provide sufficient support when joining plywood together. When you stand on clip joints the ply moves which will cause the system to fail
We install a felt underlay over the plywood base. Staples are used to holding this roofing material into place only until the shingles are installed. On the vertical joins, we overlap 100mm and on the horizontal overlap, it 50mm. On pitches below 18.5°, we can use a double layer of the saturated felt underlay to manufacturers specifications.
On very low slopes (approx. between 8 – 14 degrees) adhesive backed rubberised membrane roof material is used. Armourguard is installed to protect from driving rain and also because the water does not flow off the roof quickly
The underlay is felt paper coated in asphalt saturant on either side.
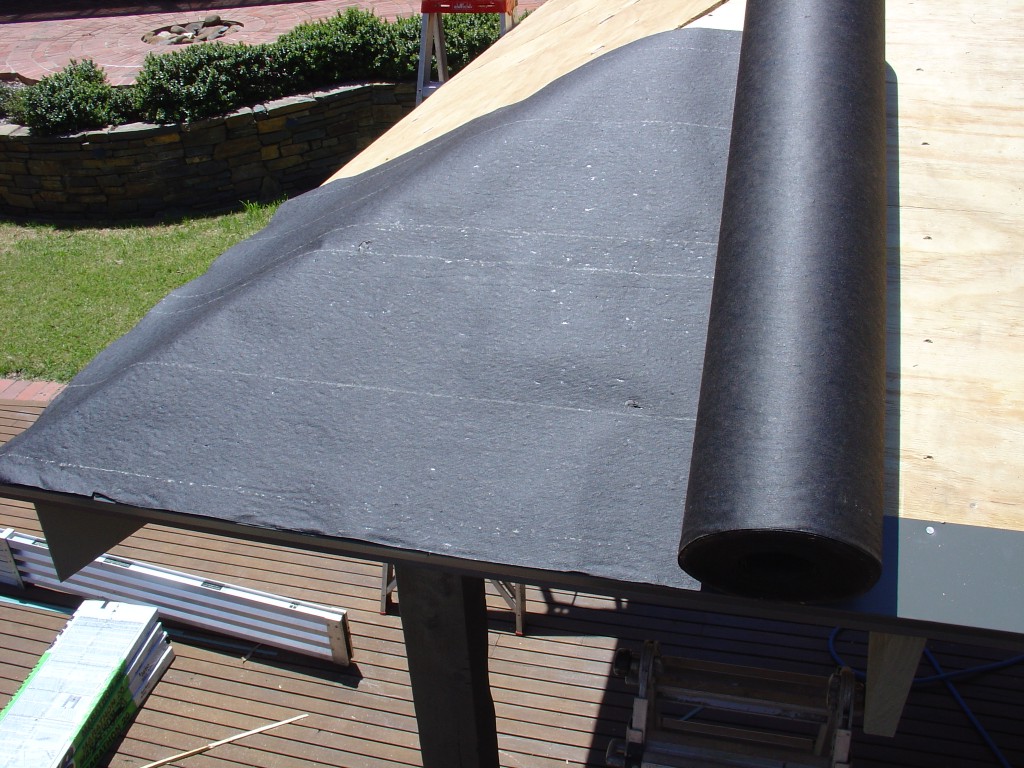
- The underlay protects the roofing shingles from anything that is released from the plywood.
- Underlay provides a secondary barrier from wind-driven rain.
- Most manufacturers of asphalt roof shingles require an underlay to validate the manufacturer’s warranty.
- Underlay can flatten out and irregularities in the ply cladding.
- Underlay is required to receive the ASTM E108 – Class A Fire rating on a fibre-glass shingle.
- The standard for the underlay material is ASTM D226 Type 1 No. 15 felt. It comes in both 15 pounds/inch or 30 pounds/inch.
We line the valleys with a thick adhesive backed rubberised membrane roof material called Armourguard. Rubber membrane provides a great waterproofing barrier, sealing around nails (see below).
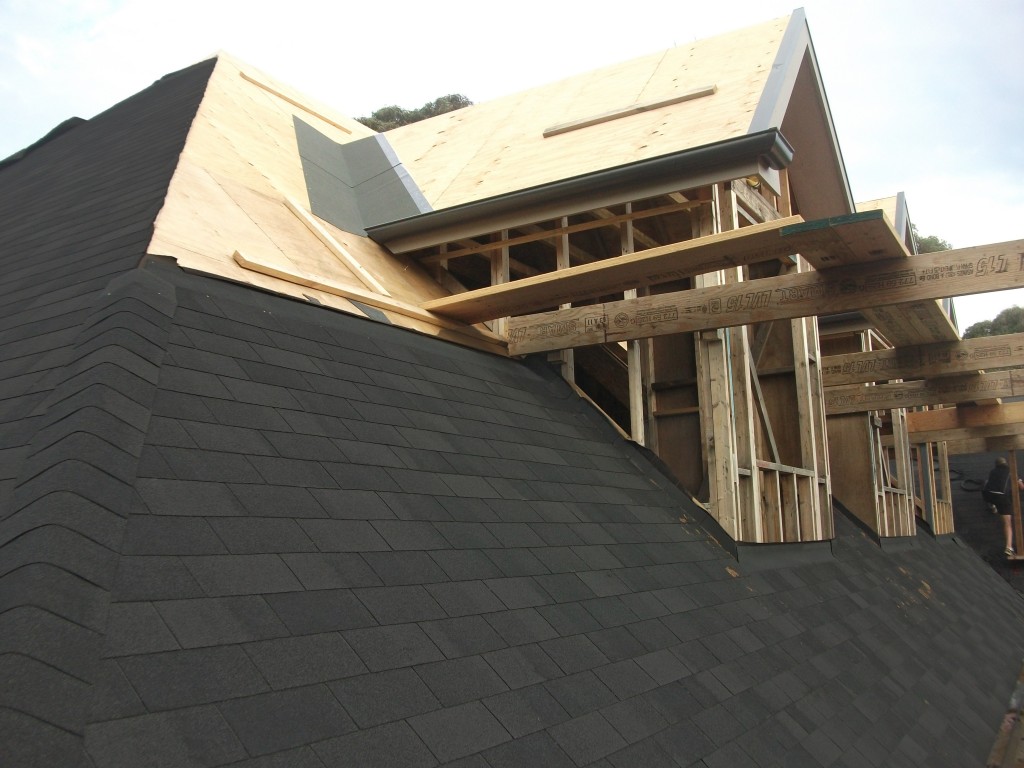
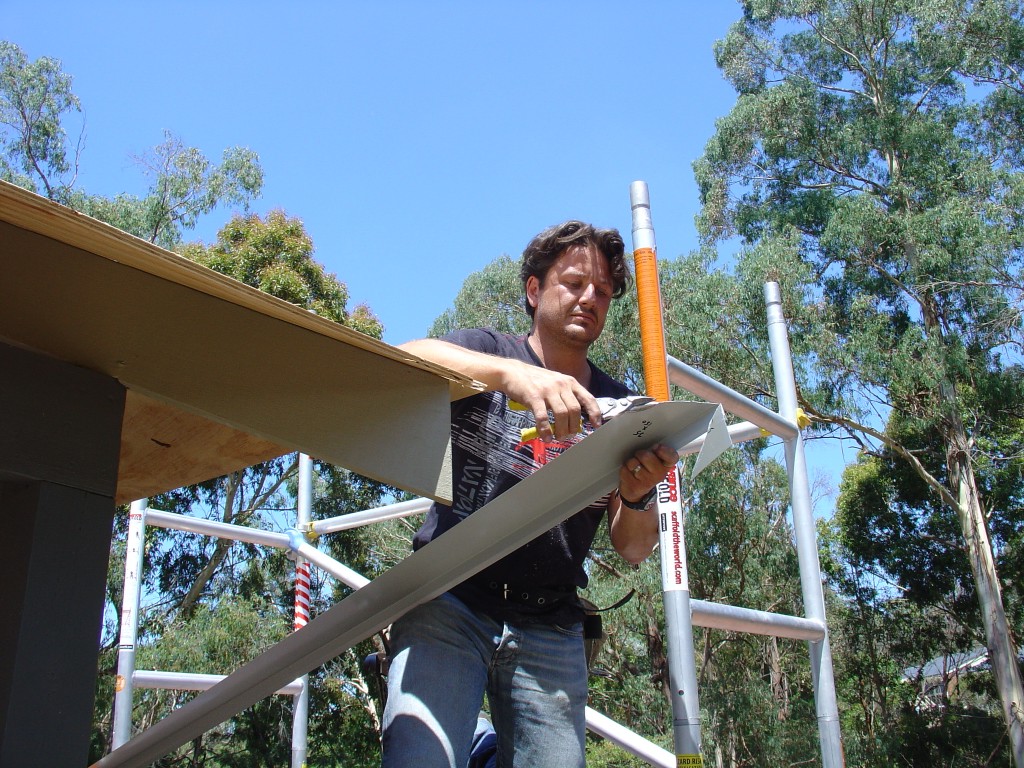
We install a flashing which extends into the gutter called a “drip-edge”. The drip edge should run 40mm into the gutter from the outside edge of the fascia. It should also run up the roof around 100mm, protecting the leading edge of the plywood material from water damage.
Asphalt roof shingles are installed with 10mm wide head / ribbed shank galvanised clout nails.
Staples can not be used to install roof shingles as they can cut through the shingle and over time they tend to work their way out of the plywood cutting the roof shingle above.
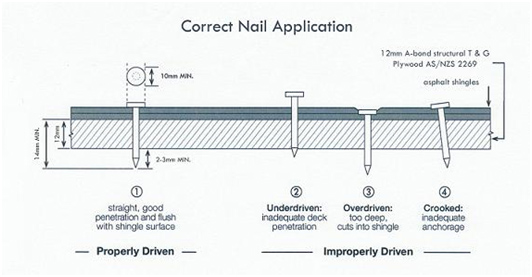
Nails are recommended by the ARMA’s (Asphalt Roofing Manufacturers Association) as they hold down the roof shingle better. The points outlined below apply to our asphalt roof shingles (refer to manufacturers guidelines for other brands)
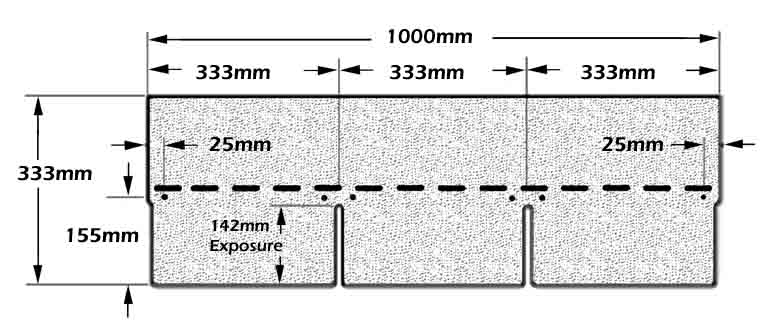
- Four nails per roof shingle minimum, six for “high wind zones.”
- Nail position is just below the glue strip and above the cut out on the Marathon roof shingles and the guideline on Laminated ranges.
- The correct installation of the clouts is shown in the diagram above, flush with the asphalt shingle.
- The clout should penetrate at least 2mm through the plywood as suggested by the ARMA.
- Ribbed shank nails are preferred as they have better-holding strength.
A six nailing pattern (see below) is used in “high wind areas”. On roofs above 60° shingles need to be manually glued down. A small 10 cent size dab of asphalt mastic on each corner of the shingle is required
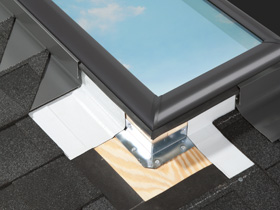
You use metal step flashing where the roof joins up to a vertical wall or penetration—for example, a skylight, chimney or air conditioning unit. The metal step is nailed over each course of asphalt shingles guiding any water out onto the main roof. The wall cladding then covers this flashing.
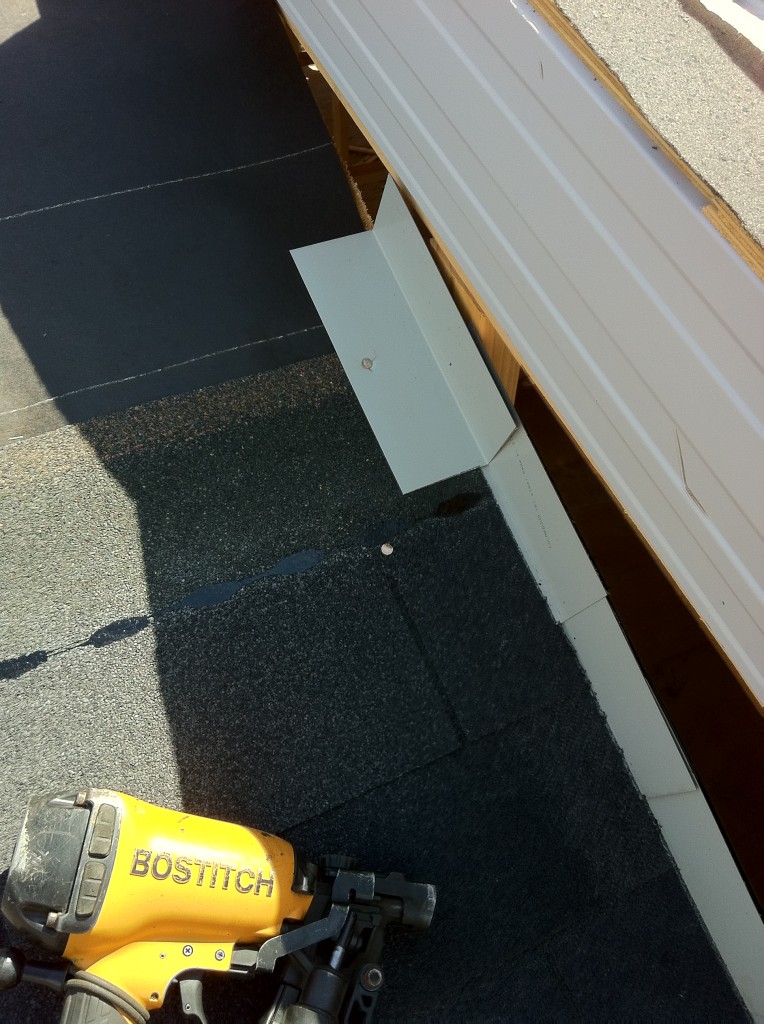
You can order the Velux range of skylights with a step flashing kit for use with roof shingles. Ask for thew EDL step flashing kit when you call.
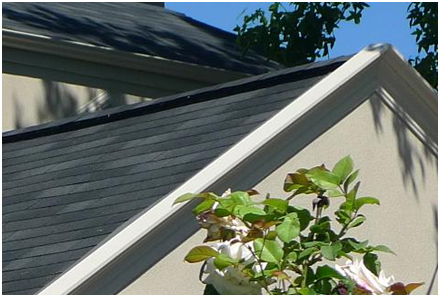
An essential installation consideration is roof ventilation. The ventilation requirements are determined by the size and design of the roof. For attic spaces above an insulated ceiling, the vent ratio is one square meter of net free ventilating area/300 square meters. For low slope roofs or cathedral ceilings, the vent ratio is one square meter/150 square meters.
Our premium ridge ventilation provides exhaust ventilation. The natural effect of the hot air rising pushes it out through at the highest point in the roof. Also, a venturi effect is created where the outside wind pulls the air from the roof space. Box vents are not adequate as they don’t provide enough net vent area. A typical sized roof would need 20+ box vents which are unrealistic and very ugly.
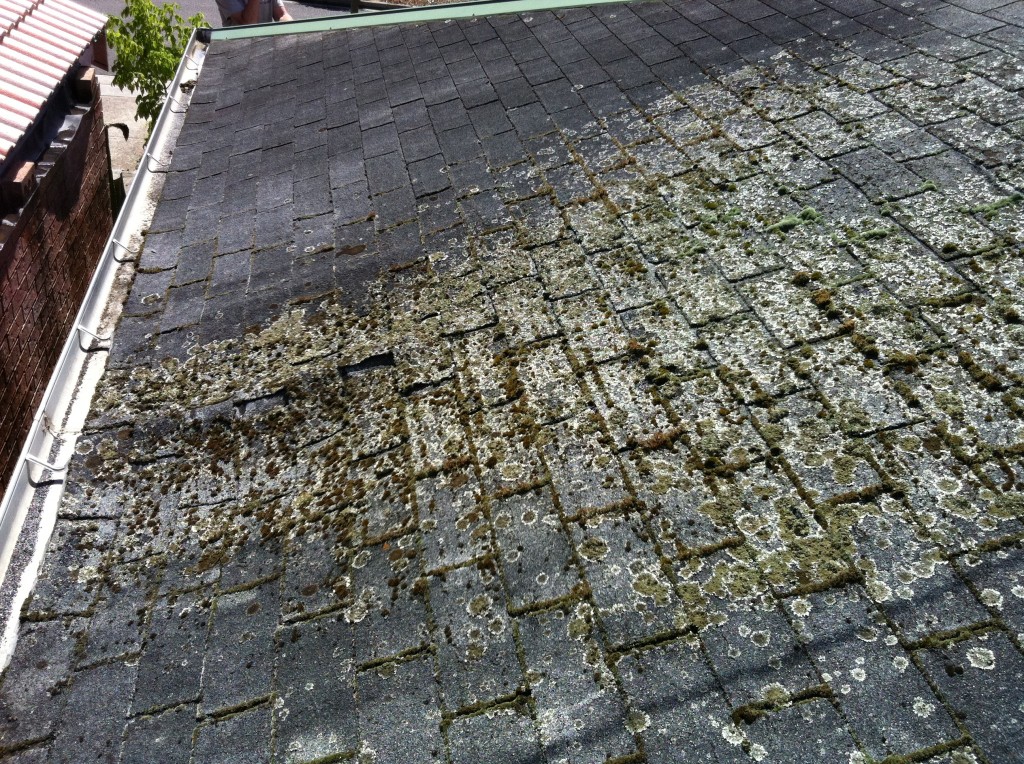
The picture below shows what can happen if some of the manufacturer’s requirements are not followed. You can see where the ply has rotted, and the roof shingles have deteriorated. The roof mainly caused this with no ventilation installed. The bathroom exhaust was vented directly into the closed roof space causing moisture to build up and rot the plywood.
Roof ventilation performs several essential tasks in an asphalt shingle roof system.
- It keeps the air temperature in the roof at +/- 10° of the outside air temperature.
- Condensation can occur on the inside of the ply deck due to the difference in the air temperatures inside and outside. Ventilation will stop this from happening, saving your roof and insulation from being damaged.
- Prevents the plywood from moving due to moisture build up
- Also stops the ply from rotting.
- The proper use of roof ventilation will add years to the life of your roof.
- Some manufacturers will void the warranty if the recommended roof ventilation is not seen.
You can see more details on the importance of roof ventilation in the articles below.
We use a premium ridge vent called Trimline. It provides adequate exhaust ventilation and has a nice low profile appearance.
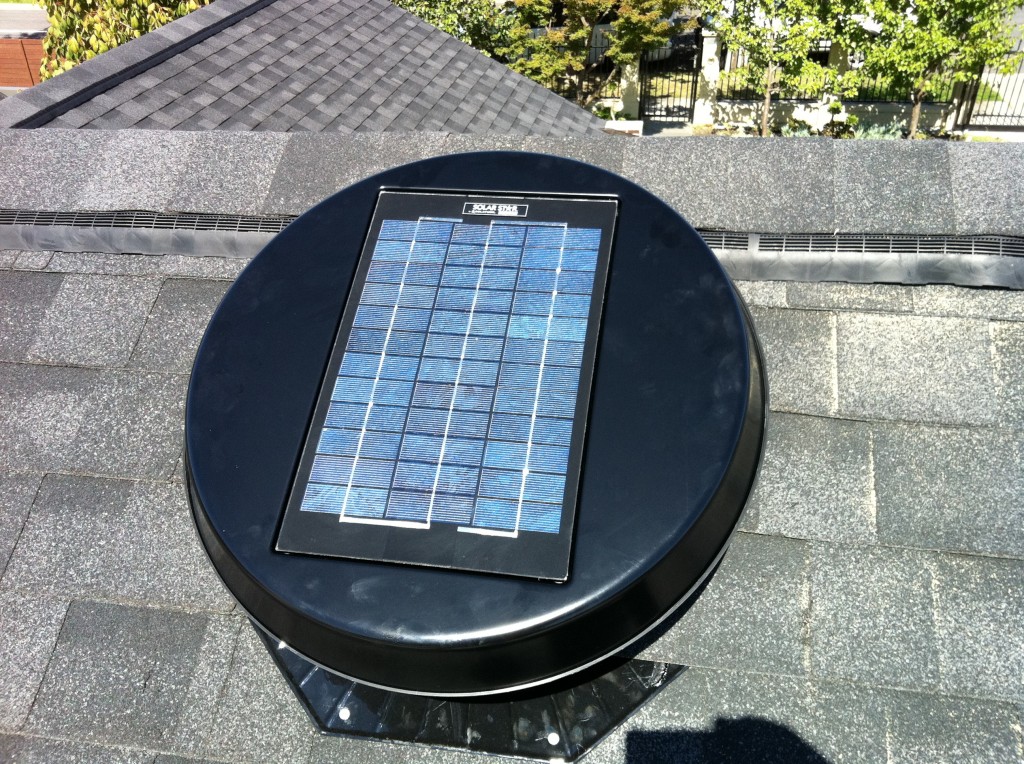
In some hip roof, designs have little to no ridge for roof ventilation. In these situations we can use a solar-powered electric vent (see below) These solar vents are brilliant at pulling the hot air from the roof during the day. When the sun goes down, the vent stops running and leaves some of the heat in the roof space. One solar-powered roof vent is equivalent to 12 “whirlybird” roof ventilators.
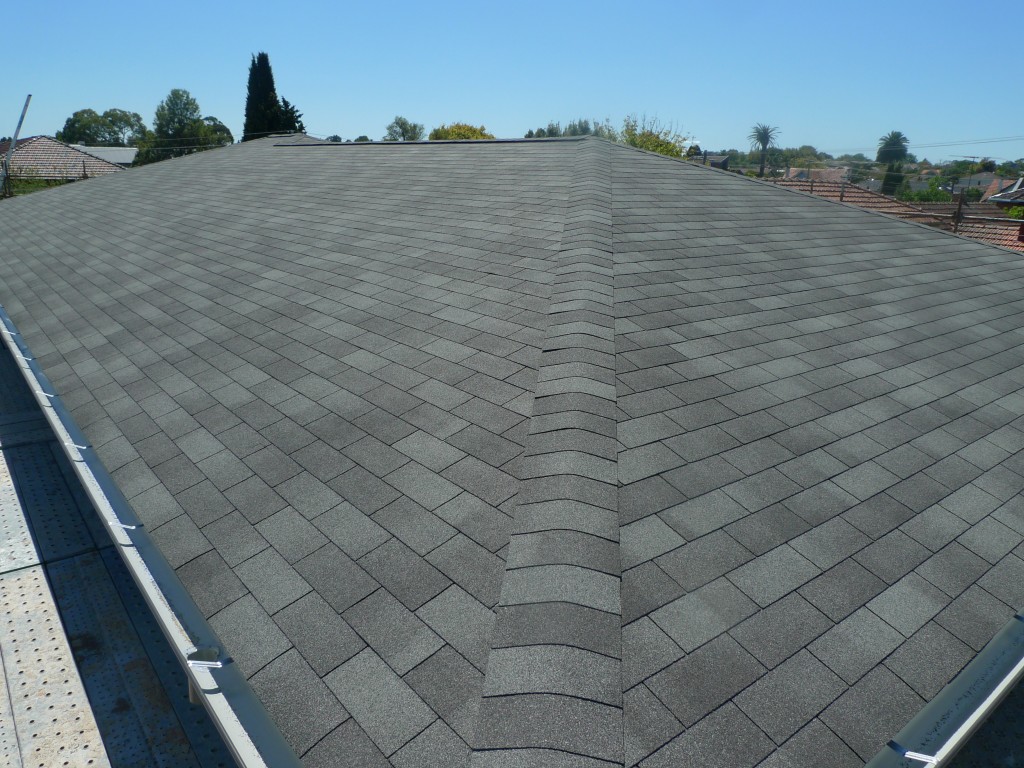
A lot to take in and understand, but it pays to have this knowledge to build the best possible asphalt roof shingle system that will protect your home for many years to come.
Call or message for roof installation techniques or to learn more about how to build a house in asphalt roof shingles. Contact Roof Shingle Supplies Australia.
